RPi deployment guide
A guide to deploy my home server stack on a Raspberry Pi.
Disclaimer: This is a rough guide
This guide was made from memory and hadn’t (yet) been fully tested.
Also, if you’re not Mish, you might struggle to follow some of the steps (especially regarding security configuration) because this is intended as a guide for future me. The rpi-docker-compose repository is unfortunately not public.
With that said, if you want to take inspiration from my setup, please do, and message me (Slack, email, Discord) because I’d be more than happy to give you some tips.
Part 1: Installation and configuration
- Install the latest Raspberry Pi OS Lite (64-bit) onto an SD card, with the following OS customization settings:
- Hostname:
rpi - Username:
rpiand a password of your choice - Do not configure wireless LAN
- Time zone “Europe/London” and keyboard layout “gb”
- Enable SSH with public-key authentication
- Hostname:
- Ensure the
homelab-data-2SSD is connected to the Pi (it’s a Crucial BX500 1TB SSD).- Use a USB SATA enclosure (such as the one with date code
20231025) because the simple USB-to-SATA adapters aren’t reliable.
- Use a USB SATA enclosure (such as the one with date code
- Install important sysadmin software, notably the
microtext editor (and adddust,lazygit,sysstatandbtopat some point) - Add the SSD to
/etc/fstab:LABEL="homelab-data-2" /mnt/data ext4 defaults,rw,noatime,data=ordered 0 0 - Apply the fstab changes with
sudo mount -a - Increase swapfile size (this is mainly to prevent Immich’s machine learning bringing down the system) in
/etc/dphys-swapfileCONF_SWAPFILE=/mnt/data/swapfile CONF_SWAPSIZE=8192 CONF_MAXSWAP=8192 - Apply the swapfile changes:
sudo dphys-swapfile {swapoff,setup,swapon} - Install and set up PiVPN: https://www.pivpn.io/ (and add a client profile for my mobile phone)
- Install
iperf3(set it up to start on boot in server mode) - Install Docker: https://docs.docker.com/engine/install/debian/#install-using-the-repository
- Customize the Docker config to store data on the data SSD. Edit
etc/docker/daemon.jsonand give it the following content:{ "data-root": "/mnt/data/docker-data" } - Install Git, configure it, and set up authentication via SSH
# git config -l
user.name=MMK21
user.email=[email protected]
core.editor=micro
# cat ~/.ssh/config Host github.com HostName github.com User git IdentityFile ~/.ssh/github - Clone the Docker compose files from Github:
git clone https://github.com/MMK21Hub/rpi-docker-compose.git ~/docker-compose-configs - Add bash aliases for Docker and apt (
micro ~/.bashrc, or you could put them in~/.bash_aliases):alias dc='docker compose' alias up='docker compose up -d' alias dcp='docker compose pull && docker compose up -d' alias aptu='sudo apt update && sudo apt upgrade' - Also, hoard Bash history lines
HISTSIZE=10000 HISTFILESIZE=10000 - Edit
~/.inputrcto provide a nicer auto-complete experience for symlinked folders:set mark-symlinked-directories on - Install dependencies for bash scripts:
jqandage(for encryption) - Get the Home Assistant Backup private key from Bitwarden and save it to
~/secrets/backup-passwords/home-assistant-db chmod 400 ~/secrets/backup-passwords/home-assistant-db-
Set up user cron jobs (run
crontab -e) (do not usesudo)# crontab -l @daily crontab -l > $HOME/.crontab # backup crontab 0 2 * * * /bin/bash /home/pi/docker-compose-configs/backup-file-to-pomf.sh /mnt/data/terraria/worlds/ACMO-S4.wld.bak 0 2 * * * /bin/bash /home/pi/docker-compose-configs/home-assistant/upload-latest-backup.sh * * * * * /home/pi/scripts/venv/bin/python /home/pi/scripts/mc_server_mon.py # Free up space used by Docker 50 0 * * 1 /usr/bin/docker system prune -aI used to use git-sync to provide version control and “backup” of the Home Assistant config, but dealing with the really large files in the config directory became too much of a bother for the benefit. Here’s the cron line, for posterity:
40 * * * * cd /mnt/data/home-assistant/data && /usr/local/bin/git-sync 2>&1 | logger -t git-sync-root
Part 2: Bringing it online
cd ~/docker-compose-configs- Bring up Caddy first becuase it has the definition for the
caddy-networknetwork (i.e.cd caddyand thenup) - Bring up
victoria(VictoriaMetrics) because quite a few things send/receive from it - Bring up the other services:
cloudflare-ddns,grafana,home-assistant,immich-app,netdata,open-webui,socks5,syncthing,terraria(note that this list changes pretty frequently, so be sure tols ~/docker-compose-configsto check if anything’s been missed accidentally) - Check CPU/RAM usage with
btop; checkdf -h - Use a web browser to test that services are running as expected
Part 3: Updating NTP servers
This is a lower-priority task than the others, but I’ve previously had issues with the default Debian NTP servers. To fix this, edit /etc/systemd/timesyncd.conf change the NTP servers line as follows:
NTP=time.google.com time2.google.com time3.google.com
Then reload everything:
sudo systemctl daemon-reload
sudo systemctl restart systemd-timesyncd
Part 4: Installing scripts (optional)
My scripts in ~/scripts are meant to be non-essential and temporary, but temporary solutions often inevitably become permanent, and it can be useful to have a way to restore them.
Pull scripts from GitHub
cd ~
git clone [email protected]:MMK21Hub/rpi-scripts.git scripts
Add scripts to crontab
Add the following line to the crontab (crontab -e):
* * * * * /home/pi/scripts/venv/bin/python /home/pi/scripts/mc_server_mon.py
Keeping things up-to-date
Updating Debian packages
You can update the OS and packages by running aptu (an alias that performs the standard update + upgrade incarnations).
Debian doesn’t require frequent updating like Arch does, but it’s good to make sure the latest security patches are installed. Therefore, I don’t have a set update schedule, but I perform an update whenever that pops into my mind.
Updating Docker services
Docker service stacks need to be updated individually when a new version is released. (This should probably be made automatic for some services in the future.) You can do it like this:
cd ~/docker-compose-configs/grafana/
dcp
The dcp alias pulls the latest images and then restarts the service.
When updating Immich, be sure to check the release notes for breaking changes.
Use of GitHub notifications
So that I know when a new version of a service I use is released, I simply watch the relevant repositories on GitHub (releases only). It’s low-tech, but has worked well so far.
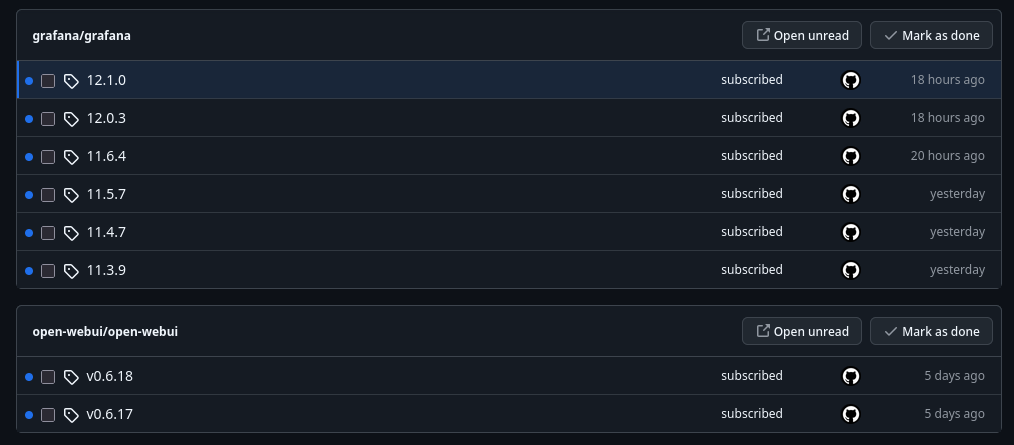
I follow the following repos:
- https://github.com/grafana/grafana
- https://github.com/open-webui/open-webui
- https://github.com/netdata/netdata
- https://github.com/VictoriaMetrics/VictoriaMetrics
- https://github.com/caddyserver/caddy
Other tasks
Off-site Immich backups
The Immich library is periodically backed up to the vigrin-backups HDD. This is currently a manual process.
- Plug the HDD in to my PC (e.g. using a USB SATA enclosoure)
- Ensure it’s mounted to my PC
- From the Pi, run
restic -r sftp:mish-arch-restic:/mnt/virgin-backups/restic/immich-media/ --verbose backup /mnt/immich/immich-library/ - Once it’s done, unmount the HDD to safely remove it, and put it away